Email: simplivent2@gmail.com
Hours: Mon-Fri: 8am – 7pm
Instructions
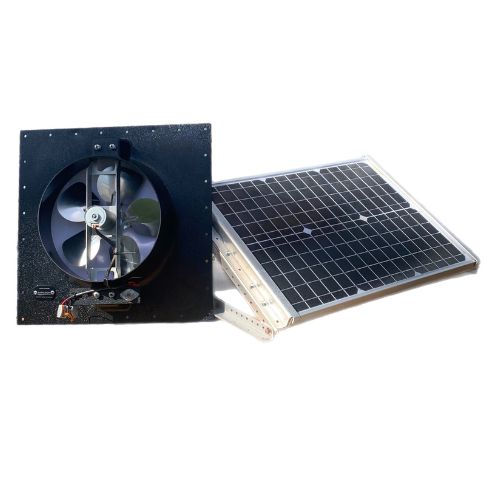
Solar Assembly
Assemble the Solar panel & Bracket
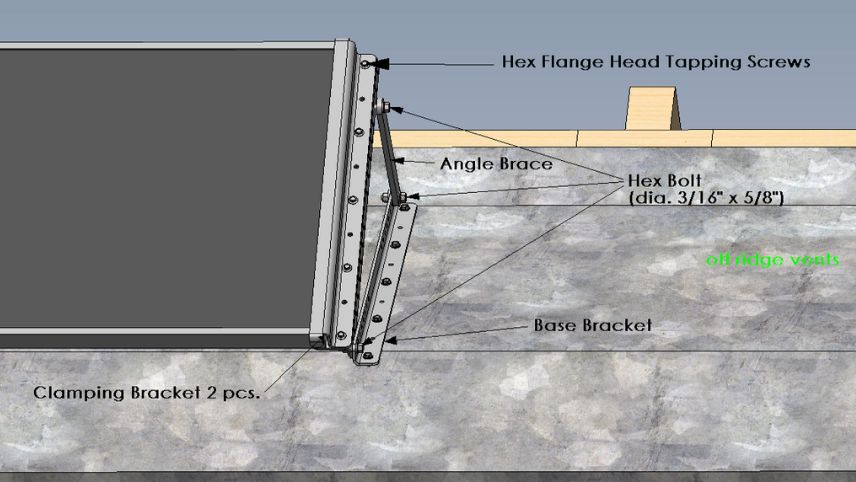
Overall Diagram
Fasten the two clamping brackets to the solar panel on each end using the Hex flange head tapping screws (10) as shown in the diagram below. Note: Make sure to use the longer L-shaped bracket for the bottom piece shown in Fig. 1
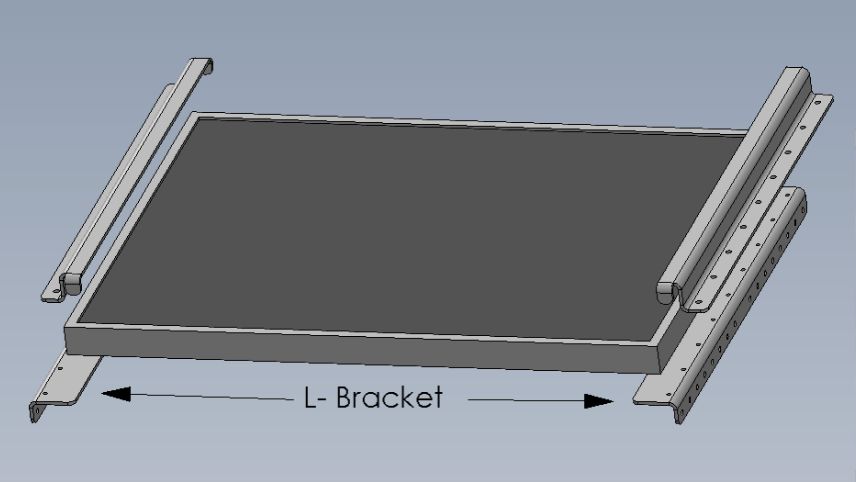
Insert the hex bolt (6), three on each side, including washers and nut to the base bracket and clamping bracket by using the angle brace. Note: Make sure to place the bolt at the bottom of the bracket to ensure swivel on the solar panel. Use the overall diagram for details.
Magnet Assembly
Fasten the magnets to the base bracket
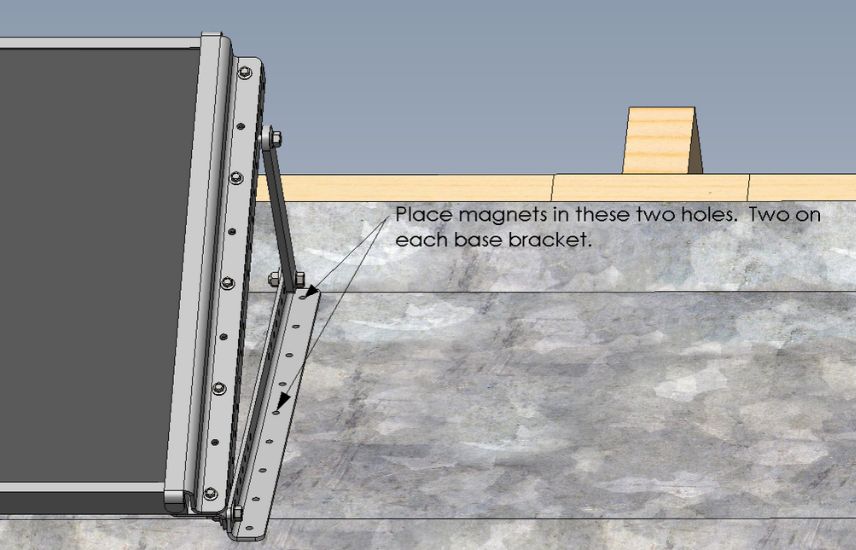
Place the four magnets into the pre-drilled holes on the base bracket, two on each base bracket. Make sure to use the nuts and washers to fasten it to the base bracket. Note: If the static vent is not metal then you can place it on the roof by using rubber grommet screws and mastic tapes to help prevent leaks. Parts not provided. Or to make it easier, use good adhesive caulk on the back of the solar panel and place it anywhere on the roof that gets good sunlight.
Placing The Solar Panel
Just place the solar panel anywhere along the back side of the vent which is the widest part of the metal. Note: Make sure the off-ridge vent is free from any debris to ensure a good bonding with the magnet. Also, be sure to place the panel in an area that gets the best sun exposure mainly south, southwest or west of the house. Note: If the static vent is not metal then you can place it on the roof by using rubber grommet screws and mastic tapes to help prevent leaks. Parts not provided. Or to make it easier, use good adhesive caulk on the back of the solar panel and place it anywhere on the roof that gets good sunlight.
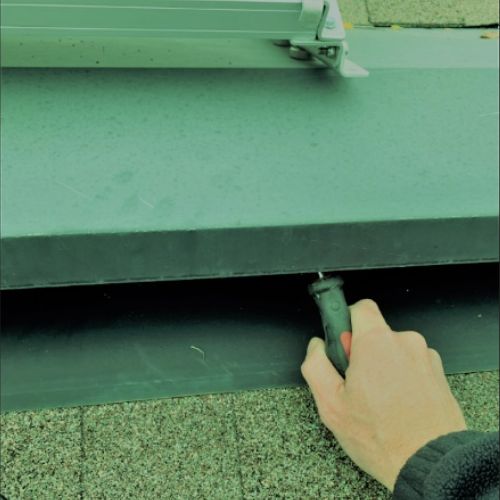
Take a screw driver and poke a hole big enough through the mesh inside the attic vent so you can fish the solar wire through the hole and into the attic as seen in the pic. Note: The end of the wire may arc when touching the mesh. You can place a cardboard over the solar panel to prevent arcing.
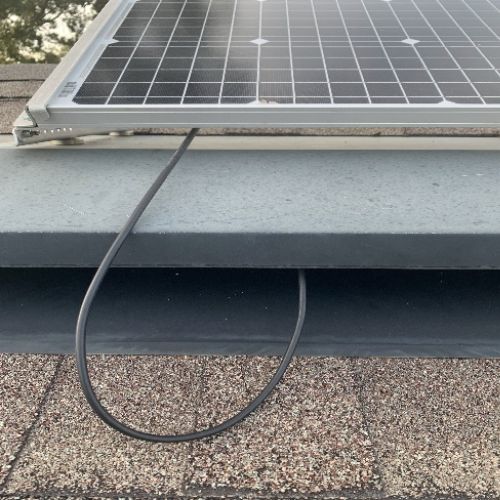
Make sure there’s a drip curve or drip loop in the wire so the water can’t travel back into the attic as seen in the example below. Note: The drip loop is already created when going over the wind buffer wall that is built in most static vents, but if there isn’t, then make sure there is one since water can’t defy the law of gravity.
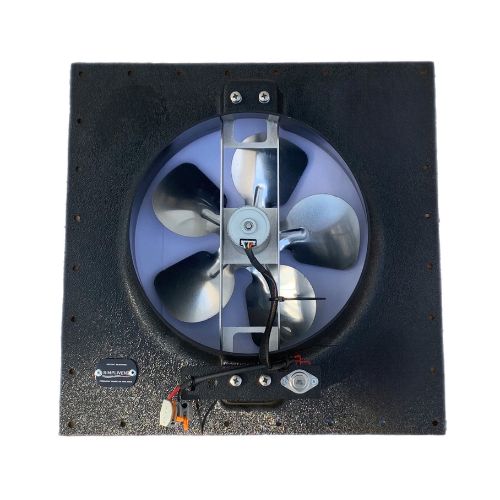
Fan Installation
Install Attic Fan
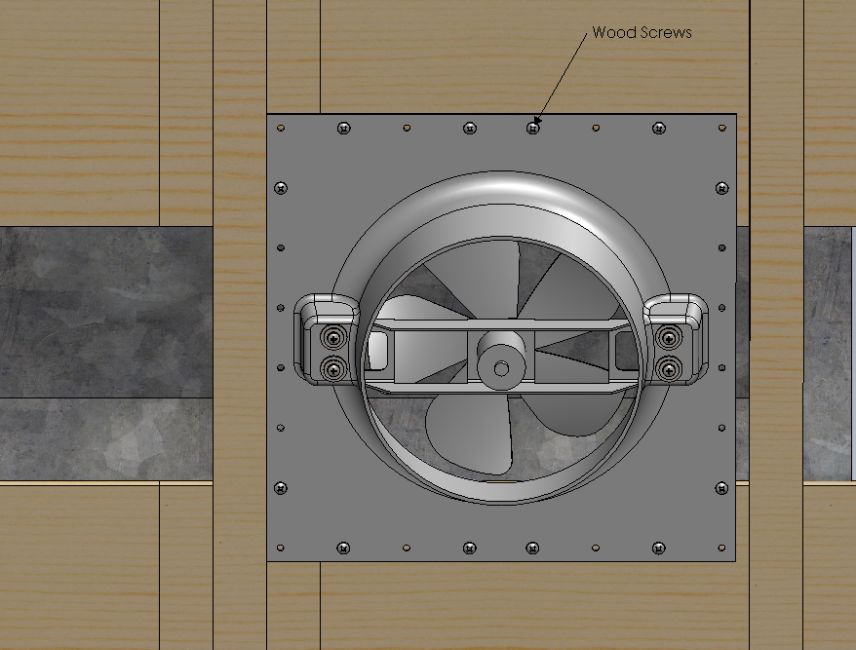
Position the fan over the opening to allow maximum airflow through the vent. Note: Make sure the solar wire can reach the connectors before fasten it to the wood.
Fasten the Phillip head screws through the pre-made holes on the housing part as seen in the picture.
Take the wire from the solar panel and plug it into the fan. Make sure the colors match with the red and black when connecting the two together. Note: The fan has a temperature sensor switch which will not come on until about 86 degrees or higher.
After you have fastened the fan, make sure to cover any remaining holes or gaps nearby with Tyvek or cloth paper to reduce back drafting. The goal is to move hot static air in the attic by forcing fresh air through the openings in the eaves.
Warranty
Simplivent Company offers lifetime motor limited warranty to the first retail purchaser of this product. The proper operation of this product is dependent on your compliance with the instructions regarding installation, operation, maintenance and testing. Failure to comply strictly with those instructions will void this limited warranty in its entirety. Warranties do not cover damages related to hailstorms.
The purchaser must include a brief description of the problem and a dated proof-of- purchase receipt with any product returned for warranty repair.
During the limited warranty, if the purchaser feels the solar fan is defective in any way, please write to Simplivent Company.